Matt Cain
June 27, 2017
Today's internet is complicated. Wars are started over React state management, new languages are written just to make Angular work agreeably, and don't get started over all the hate for Node.
In the frenzy surrounding new tech, simplicity gets forgotten. Services like Cosmic challenge this. So in the spirit of doing the opposite, we're going to build a sleek real estate listing app (with a social flavor) that's easy to use.
TL;DR
View the demo
View the full codebase on GitHub
Getting Started
We'll be using Cosmic to manage all of our content and to deploy the site. We'll be building out the front end in Ember.js.
We're using Ember because it's opinionated. Our app won't be sensitive to performance issues on any modern device, so we can take advantage of a high level of abstraction that fits our design philosophy.
Setting Up the App
Assuming you have Node installed, open a terminal and run the commands in each step.
0. Set Up a Quick Server
- Make a new directory, CosmicRealEstate to be used as the project's root.
- Within CosmicRealEstate, make the directories app (to store the router) and public (which will store the Ember.js build).
- Under CosmicRealEstate create the file server.js with the following contents:
var express = require('express');
var app = express();
var port = process.env.PORT || 3000;

app.use(express.static(__dirname + '/public'));

require('./app/routes')(app);

app.listen(port);

exports = module.exports = app;- In the app directory create routes.js and add the following code:
module.exports = function(app) {
       app.get('*', function(req, res) {
           res.sendfile('./public/index.html'); // load our public/index.html file
       });
};- In a terminal, within CosmicRealEstate, run:
npm init
npm install express --save
You know have a simple Express application set up that will let us deploy the app on Cosmic. Later, we'll build our Ember app into the public directory. Run the following commands within CosmicRealEstate:
1. Install Ember's CLI
npm install -g ember-cli
npm install -g phantomjs
(Ember uses Phantonjs for running tests)
2. Generate the Ember Project Structure
ember new cosmic-real-estate && cd cosmic-real-estate
4. Install Bootstrap
From within the comsic-real-estate directory, install the Ember Bootstrap addon to automatically include Bootstrap in your build path
ember install ember-bootstrap
5. Fire Up Your Development Server
ember serve
Open your browser and you'll see the Ember welcome page at localhost:4200.
Building Your Listings Route
Now that you have your app's boilerplate code in place, let's start by building out a page to show all the listings in our Cosmic bucket.
0. Get Rid of the Welcome Code
We appreciate Ember's warm welcome, but we need to get to work. Go ahead and delete the following code from your app's main Handlebars template.
{{!-- app/templates/application.hbs --}}

{{!-- The following component displays Ember's default welcome message. --}}
{{welcome-page}}
{{!-- Feel free to remove this! --}}
Now, add a container around the remaining {{outlet}} (this is where your routes will render). Your application template will now look like this:
{{!-- app/templates/application.hbs --}}

<div class="container" style="margin-top:20px">
    {{outlet}}
</div>
1. Generate the Listings Route and Give your Template a Welcome Mat
Inside the cosmic-real-estate directory, run:
ember g route listings
Then, in your newly created Listings template, add the following HTML:
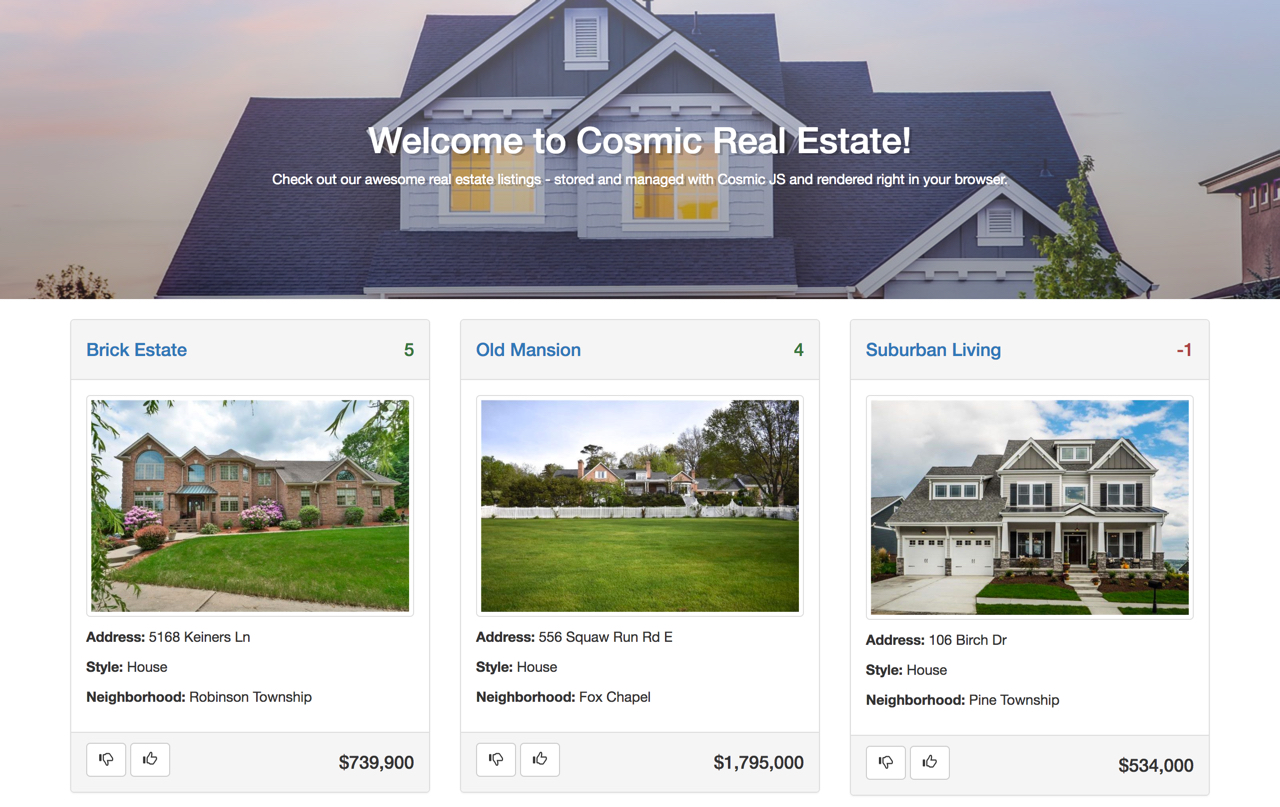
<div class="jumbotron" style="margin-top: 20px">
  <h1>Welcome to Cosmic Real Estate!</h1>
  <p>
    Check out our awesome real estate listings -
    stored and managed with Cosmic and
    rendered right in your browser.
  </p>
</div>
If you go to localhost:4200/listings you'll see beginnings of our listings page.
2. Generate an Index Route to Make Your Listings Show on the Root URL
We want to forward the root domain to our listings page, so first run:
ember g route index
Then, open the route handler for Index and add the following code to the route's export:
// app/routes/index.js

export default Ember.Route.extend({
  beforeModel() {
    this.replaceWith('listings');
  }
});
Ember uses a series of lifecycle hooks for validation when rendering a route. Calling beforeModel() utilizes the first of these hooks to tell the route handler to immediately take us to the listings route. Visiting localhost:4200 will now take us to localhost:4200/listings.
Retrieving Data From Cosmic
We'll want to show our users listings that we've stored in Cosmic. To do so, we'll use Ember's built in data store, Ember Data, to retrieve listings from Cosmic to store in corresponding models.
0. Set Up Your Bucket From this point on, we'll assume you already have a Cosmic bucket created. (This guide's bucket slug will be cosmic-real-estate.) You'll set your's in your ENV variables later. In the cosmic-real-estate bucket are objects of type "Listing" with the following structure:
Listing:
| Cosmic Metafield | Type |
|---|---|
| Price | Text Input |
| Address | Text Input |
| Profile Image | Image |
| Style | Radio Select |
| Neighborhood | Text Input |
| Beds | Text Input |
| Baths | Text Input |
| Square Feet | Text Input |
| Zipcode | Text Input |
As emphasized at the beginning of this guide, Ember is convention over configuration. Ember Data handles all of the nasty AJAX and caching work that you don't want to do. All we have to do is tell Ember where to look for our data, how to interpret it, and how it fits in our models.
1. Create a Listing Model
As with any other web app framework, models in Ember simply act as a container for your backend data. We'll use a Listing model to match our Listing object in our Cosmic bucket. Run:
ember g model Listing
In the newly created listing file, add the following code:
// app/models/listing.js

export default DS.Model.extend({
  title: DS.attr(),
  price: DS.attr(),
  address: DS.attr(),
  profileImage: DS.attr(),
  style: DS.attr(),
  neighborhood: DS.attr(),
  beds: DS.attr(),
  baths: DS.attr(),
  squareFeet: DS.attr(),
  zipCode: DS.attr()
});
We've now specified what properties a Listing will have, i.e. which properties to look for when grabbing data from our bucket.
2. Create a Listing Adapter and Serializer
Cosmic operates on an intuitive REST API, so we'll take advantage of Ember Data's built in REST Adapter and JSON Serializer. We'll just have to make a few slight tweaks to fit them to the Cosmic API spec. To generate the listing adapter, run:
ember g adapter listing
To generate the serializer:
ember g serializer listing
Ember will now automatically use the Listing serializer and adaptaer for anything dealing with the Listing model.
3. Tweak the Listing Adapter
By default, Ember's REST Adapter points to sligtly different endpoints than we need to fetch data from our bucket. So, add the following code to the Listing adapter, making sure you swap out DS.JSONAPIAdapter for DS.RESTAdapter:
// app/adapters/listing.js

export default DS.RESTAdapter.extend({
  host: 'https://api.cosmicjs.com/v1/cosmic-real-estate',
  urlForFindAll(modelName, snapshot) {
    let path = this.pathForType(modelName);
    return this.buildURL() + '/object-type/' + path;
  },
  urlForQueryRecord(slug) {
    return this.buildURL() + '/object/' + slug;
  }
});
The effect is that every time we query the Data Store for Listings, we tell Ember to fetch them from the response at https://api.cosmicjs.com/v1/cosmic-real-esate/object-type/listingor https://api.cosmicjs.com/v1/cosmic-real-esate\object\listing-slug, depending on whether we're retrieving a single listing or multiple.
4. Tweak the Listing Serializer
Cosmic gives us our data in a format slightly different from what Ember's REST Serializer expects. For example, Cosmic returns this
{
  "objects": [
    {
      "_id": "59403aefacfbc8d252000563",
      "slug": "example-condo",
      "title": "Example Condo",
      "content": "",
      "bucket": "593f696bacfbc8d2520000df",
      "type_slug": "listings",
      "created_at": "2017-06-13T19:20:15.485Z",
      "created_by": "593f691ea768e28650000334",
      "created": "2017-06-13T19:20:15.485Z",
      "status": "published",
      "metadata": {
        "price": 545000,
        "address": "2100 High Avenue",
        "profile": {
          "url": "https://www.cosmicjs.com/uploads/4ff36ce0-506d-11e7-9f7d-dbfbf1c66da0-ex-condo.jpeg",
          "imgix_url": "https://cosmicjs.imgix.net/4ff36ce0-506d-11e7-9f7d-dbfbf1c66da0-ex-condo.jpeg"
        },
        "style": "Condo",
        "location": "Uptown"
      },
      // etc...
where Ember expects:
{
    "listings": [
        {
            "id": 1,
            "title": "example-condo",
            "price": 54000,
            // etc...
The two main discrepancies here are that objects doesn't match our model name and that most of the primary properties we need are stored in metadata. To fix this, add the following code to the listing serializer, making sure to swap DS.JSONAPISerializer for DS.RESTSerializer.
// app/serializers/listing.js

import DS from 'ember-data';

function buildNormalizeListing(source) {
  return {
    id: source._id,
    slug: source.slug,
    content: source.content,
    title: source.title,
    price: source.metadata.price,
    address: source.metadata.address,
    profileImage: source.metadata.profile.url,
    style: source.metadata.style,
    neighborhood: source.metadata.neighborhood,
    beds: source.metadata.beds,
    baths: source.metadata.baths,
    squareFeet: source.metadata.square_feet,
    zipCode: source.metadata.zip_code

  }
}

export default DS.RESTSerializer.extend({
  normalizeResponse(store, primaryModelClass, payload, id, requestType) {
    if (payload.objects) {
      let normalizedListings = payload.objects.map(function(listing) {
        return buildNormalizeListing(listing)
      });
      payload = {
        listings: normalizedListings
      };
    } else {
      let normalizedListing = buildNormalizeListing(payload.object);
      payload = {
        listing: normalizedListing
      }
    }
    return this._super(store, primaryModelClass, payload, id, requestType);

  }
});
For each of the Listings in the objects array returned by Cosmic, we create a new object with only the properties we want and map those to a new array. We then create a new hash to point our payload reference to with the listings key Ember is looking for. Pack it all together by calling _super, and our app is ready to do business with Cosmic. (The process is similar for retrieving a single listing, so we abstract that into buildNormalizedListing())
Displaying the Listings
We want our users to be able to view individual listings to get more detailed information about them. To do that we need to take advantage of Ember's nested routes.
1. Generate an Index Route Under Listings
The listings/index route will take the place of our original listings route. Run:
ember g route listings/index
2. Move the Listings Template Code and Route Code
Move the following snippet of code from app/templates/listings.hbs to app/templates/listings/index.hbs
{{!-- app/templates/listings.hbs --}}

<div class="row">
  {{#each model as |currentListing|}}
    <div class="col-sm-4" >
       {{real-estate-listing listing=currentListing}}
    </div>
  {{/each}}
</div>
Where you removed that last bit from the Listings template, add {{outlet}}. That is, listings.hbs now looks like this:
{{!-- app/templates/listings.hbs --}}

<div class="container">
  <div class="row">
    <div class="col-md-12">
      <div class="jumbotron" style="margin-top: 20px">
        <h1>Welcome to Cosmic Real Estate!</h1>
        <p>
          Check out our awesome real estate listings -
          stored and managed with Cosmic and
          rendered right in your browser.
        </p>
      </div>
    </div>
  </div>
</div>

<div class="container">
  {{outlet}}
</div>
The {{outlet}} helper simply specifies where child routes will render in a template.
Finally, make rendering all of the listings a behavior specific to the index route by moving the following snippet from app/routes/listings.js to app/routes/listings/index.js.
  model() {
    return this.get('store').findAll('listing');
  }
3. Create a Listing Route for Individual Listings
First, run:
ember g route listings/listing
When we open an individual listing, we want that to be reflected in the URL, so add the following code to the router to show the listing id at the end of the url.
// app/router.js

Router.map(function() {
  this.route('listings', function() {
    this.route('listing', { path: '/:listing_id'});
  });
});
4. Prepare the Listing Template to Show Data
Before we can let users check out a listing, we need to give them something to look at. Add the following HTML to the Listing child route:
<div class="row">
  <div class="col-sm-12">
    <ul class="nav nav-pills">
      <li role="presentation"><a href="#description">Description</a></li>
      <li role="presentation"><a href="#stats">Stats</a></li>
      <li role="presentation">{{#link-to 'listings'}}Return to Listings{{/link-to}}</li>
    </ul>
  </div>
  <div class="col-sm-9">
    <div class="page-header">
      <h1>
        {{model.title}}
      </h1>
    </div>
  </div>
  <div class="col-sm-3">
      <h1>
        <span class="text-success">{{format-price model.price}}</span>
      </h1>

  </div>
</div>
<div class="row">
  <div class="col-md-6">
    <img src={{model.profileImage}} class="img-responsive" />
  </div>
  <div class="col-md-6">
      <ul class="list-group">
      <li class="list-group-item"><strong>Address:</strong><span class="pull-right">{{model.address}}</span></li>
      <li class="list-group-item"><strong>Style:</strong><span class="pull-right">{{model.style}}</span></li>
      <li class="list-group-item"><strong>Neighborhood:</strong><span class="pull-right">{{model.neighborhood}}</span></li>
      <li class="list-group-item"><strong>Beds:</strong><span class="pull-right">{{model.beds}}</span></li>
      <li class="list-group-item"><strong>Baths:</strong><span class="pull-right">{{model.baths}}</span></li>
      <li class="list-group-item"><strong>Square Feet:</strong><span class="pull-right">{{model.squareFeet}}</span></li>
      </ul>
  </div>


  <div class="col-sm-6">
    <h3 id="description">Description</h3>
    <span class="text-muted">{{{model.content}}}</span>
  </div>
</div>
Notice three new Handlebars features we're using: Using triple braces with {{{model.content}}} forces Handlebars to not escape the HTML in the content field. The {{#link-to}}helper in the menu automatically generates a proper link for us to whichver route we specify. We'll use this in the next step to actually dynamically link to listings. * The {{format-price}} helper, which we'll be making ourselves next.
5. Generate a Helper to Format the Price
In Ember we have the option to generate custom helpers. We'll do this to display the listing's price as a currency. Run:
ember g helper filter-price
Then, in the new Format Price helper, add the following code:
// app/helpers/format-price.js

export function formatPrice(value) {
  return '$' + value.toLocaleString();
}
6. Link to the Listings
We'll need to dynamically generate a link to a listing's particular page from it's slug. We can do this painlessly using the {{#link-to}}} helper we just used in the previous step.
In the Real Estate Listing component, wrap {{listing.title}} in a {{#link-to}} like this:
{{!-- app/templates/components/real-estate-listing.hbs --}

{{#link-to 'listings.listing' listing}}{{listing.title}}{{/link-to}}
We pass the model as the second parameter, and Ember automatically takes care of matching the routes. However, you might notice that our links now point to meaningless strings that Ember is using as unique ID's for the listings. As a simple fix, go into your Listing serializer and add this line to tell Ember to use the Listing slug as it's primary key:
// app/serializers/listing.js

export default DS.RESTSerializer.extend({
  primaryKey: 'slug',
  normalizeResponse(store, primaryModelClass,
  // etc...
We now have individual Listing routes and links to them that work just as we'd expect them to.
Make it Social
At this point we have ourselves a functioning real estate listing app. But, rather than end with something boring, we'll add a little flair. We want our users to be able to (in this case anonymously) vote on our listings. Cosmic will help us manage this.
1. Update the Listing object, model, and serializer In your Cosmic bucket, add the metafield upvotes with a default value of 0 to your Listing Object. Update the Listing model accordingly:
// app/models/listing.js

//etc...
  zipCode: DS.attr(),
  content: DS.attr(),
  upvotes: DS.attr()
});
- Update buildNormalizedListing() in the Listing serializer
// app/serializers/listing.js

function buildNormalizeListing(source) {
  return {
    //etc...
    zipCode: source.metadata.zip_code,
    upvotes: source.metadata.upvotes
  }
}
2. Update the Real Estate Listing Component
After adding an upvote button, a downvote button, and a vote counter, your Real Estate Listing template will look like this:
{{!-- app/templates/components/real-estate-listing.hbs --}}

<div class="panel panel-default">
  <div class="panel-heading">
    <h4>
      {{#link-to 'listings.listing' listing}}{{listing.title}}{{/link-to}}
      <span class="pull-right">
        {{upvotes}}
      </span>
    </h4>
  </div>
  <div class="panel-body">
    <p>
      <img src="{{listing.profileImage}}" class="img-thumbnail" style="background-color: #fff;height:auto"/>

    </p>
    <p>
      <strong>Address:</strong> {{listing.address}}
    </p>
    <p>
      <strong>Style:</strong> {{listing.style}}
    </p>
    <p>
      <strong>Neighborhood:</strong> {{listing.neighborhood}}
    </p>
  </div>
  <div class="panel-footer">
    <p class="pull-left">
      <button {{action "vote" "down"}} class="btn btn-default"><span class="glyphicon glyphicon-thumbs-down"></span></button>
      <button {{action "vote" "up"}} class="btn btn-default"><span class="glyphicon glyphicon-thumbs-up"></span></button>
    </p>
    <p class="text-right">
       <h4>{{format-price listing.price}}</h4>
    </p>
  </div>
</div>
Notably, we've added a thumbs-up and a thumbs-down button that take advantage of Ember's action helper to handle the click. We pass "vote" to specify the action to be called and "up" or "down" to indicate the direction of the vote. To get the buttons working, we need to implement the vote() action in the Real Estate Listing controller.
3. Implement the Vote Action
To handle the voting action, we'll take our first look at the Real Estate Listing component's controller.
Our first step in this process is to give the controller access to the listing's slug and upvotes. We do this through computed properties, which look like this:
// app/components/real-estate-listing.js

export default Ember.Component.extend({
  slug: Ember.computed('slug', function() {
    return this.get('listing.id');
  }), //etc...
Note that we use listing.id to retrive the slug since we've defined the slug as the model's primary key.
Second, we add the property store: Ember.inject.service() to give ourselves access to the Data Store within the component.
Finally, we define the vote() action in the action hash:
// app/componenets/real-estate-listing.js

actions: {
    vote(direction) {
      let upvotes = this.get('upvotes');
      direction === 'up' ?
        upvotes++ :
        upvotes--;
      this.set('upvotes', upvotes);
      let slug = this.get('slug');
      let store = this.get('store');
      updateVote(upvotes,slug,store);
    }
}
(updateVote() is implemented above export)
All said and done, your Real Estate Listing component will look like this:
import Ember from 'ember';

function updateVote(upvotes,listing_slug,store) {
  store.findRecord('listing', listing_slug).then(function(listing) {
    listing.set('upvotes',upvotes);
    listing.save();
  })
}

export default Ember.Component.extend({
  store: Ember.inject.service(),
  upvotes: Ember.computed('upvotes', function() {
    return this.get('listing.upvotes');
  }),
  slug: Ember.computed('slug', function() {
    return this.get('listing.id');
  }),
  actions: {
    vote(direction) {
      let upvotes = this.get('upvotes');
      direction === 'up' ?
        upvotes++ :
        upvotes--;
      this.set('upvotes', upvotes);
      let slug = this.get('slug');
      let store = this.get('store');
      updateVote(upvotes,slug,store);
    }
  }
});
The buttons now increment/decrement the vote count, but if you refresh the page you'll notice the changes aren't persisting. If you check the console you'll see why.
Next, we need to revist our old friends the Adapter and the Serializer to handle our update requests.
4. Tweak the Serializer (Again)
Copy the code below to override the serialize() method:
// app/serializers/listing.js

export default DS.RESTSerializer.extend({
  primaryKey: 'slug',
  normalizeResponse(store, primaryModelClass, payload, id, requestType) {
    // etc...
  },
  serialize(snapshot, options) {
    var json = this._super(...arguments);
    let payload = {
      "slug": snapshot.id,
      "metafields": [
        {
            "required": true,
            "value": json.price,
            "key": "price",
            "title": "Price",
            "type": "text",
            "children": null
        },
        {
            "required": true,
            "value": json.address,
            "key": "address",
            "title": "Address",
            "type": "text",
            "children": null
        },
        {
            "value": json.profileImage.split('/').slice(-1)[0],
            "key": "profile",
            "title": "Profile",
            "type": "file",
            "children": null,
            "url": json.profileImage,
            "imgix_url": "https://cosmicjs.imgix.net/" + json.profileImage.split('/').slice(-1)[0];
        },
        {
            "required": true,
            "options": [
                {
                    "value": "House"
                },
                {
                    "value": "Apartment"
                },
                {
                    "value": "Condo"
                }
            ],
            "value": json.style,
            "key": "style",
            "title": "Style",
            "type": "radio-buttons",
            "children": null
        },
        {
            "value": json.beds,
            "key": "beds",
            "title": "Beds",
            "type": "text",
            "children": null
        },
        {
            "value": json.baths,
            "key": "baths",
            "title": "Baths",
            "type": "text",
            "children": null
        },
        {
            "value": json.squareFeet,
            "key": "square_feet",
            "title": "Square Feet",
            "type": "text",
            "children": null
        },
        {
            "required": true,
            "value": json.neighborhood,
            "key": "neighborhood",
            "title": "Neighborhood",
            "type": "text",
            "children": null
        },
        {
            "required": true,
            "value": json.zipcode,
            "key": "zipcode",
            "title": "zipcode",
            "type": "text",
            "children": null
        },
        {
            "value": json.upvotes,
            "key": "upvotes",
            "title": "Upvotes",
            "type": "text",
            "children": null
        }
    ]
    }
    return payload;
  }
});
5. Tweak the Adapter Again
In the Adapter's export, we need to override urlForUpdateRecord() and updateRecord(). Once we do so, we have:
// app/adapters/listing.js

import DS from 'ember-data';

export default DS.RESTAdapter.extend({
  host: 'https://api.cosmicjs.com/v1/cosmic-real-estate',
  urlForFindAll(modelName, snapshot) {
    let path = this.pathForType(modelName);
    return this.buildURL() + '/object-type/' + path;
  },
  urlForFindRecord(slug) {
    return this.buildURL() + '/object/' + slug;
  },
  urlForUpdateRecord() {
    return this.buildURL() + '/edit-object';
  },
  updateRecord: function(store, type, snapshot) {
    var data = {};
    var serializer = store.serializerFor(type.modelName);

    serializer.serializeIntoHash(data, type, snapshot);
    data = data.listing;
    var id = snapshot.id;
    var url = this.buildURL(type.modelName, id, snapshot, 'updateRecord');

    return this.ajax(url, "PUT", { data: data });
  }
});
Make it All Look Nice
With our voting functionality added in, we'll add a couple features to pull the app together before it's complete.
1. Make a Filter for the Votes
Just as we did for the price, we'll make a filter to make the votes look pretty. Run:
ember g helper format-upvotes
Then, in the newly created Format Upvotes filter, add the following (replacing the default parameters):
// app/helpers/format-upvotes.js

export function formatUpvotes(upvote) {
  if (upvote > 0) {
    return '<span class="text-success">' + upvote + '</span>';
  } else if (upvote < 0) {
    return '<span class="text-danger">' + upvote + '</span>';
  } else {
    return '<span class="text-muted">' + upvote + '</span>';
  }
}
To get it working, swap out {{upvotes}} in the Real Estate Listing template for {{{format-upvotes upvotes}}}. (Remember, triple braces tell Handlebars to not escape the return value.)
2. Add the upvote count to the Invidual Listings
In the Individual Listing template, where {{model.title}} is, add:
{{!-- app/templates/listings/listing.hbs --}}

<div class="page-header">
  <h1>
    {{model.title}} <small>Upvotes: {{{format-upvotes model.upvotes}}}</small>
  </h1>
</div>
Deploy the App
0. Hack Together an Endpoint to Serve the Keys in Express
Assuming you're using Cosmic to deploy your app, you'll automatically have access to your bucket's slug, read key, and write key via Node's process.env. However, since we've completely isolated our front end and using Express only to serve it, making these ENV variables accessible isn't the most straightforward task.
We'll take the route of serving them through an endpoint on our Express server. We'll retrieve them with a simple AJAX call in the Listing Adapter, as we don't need them elsewhere. (Note that we won't be doing it securely but it wouldn't be much more work to add authentication.)
Now working out of CosmicRealEstate, we'll use the router to serve a JSON object containing our keys at /api.
// CosmicRealEstate/app/routes.js

module.exports = function(app) {
    app.get('/api', function(req,res){
      return res.json({
        bucket: process.env.COSMIC_BUCKET,
        writeKey: process.env.COSMIC_WRITE_KEY,
        readKey: process.env.COSMIC_READ_KEY
      });
    });
    app.get('*', function(req, res) {
      var path = require('path');
      res.sendFile(path.join(__dirname, '../public', 'index.html')); // load our public/index.html file
    });

};
(Make sure the /api route goes before the wildcard route to override it).
Then, moving back into our Ember app to take care of the Listing Adapter, we need to do three things: 1. Import ember to give us access to jQuery 2. Import the configuration file so we can check the build environment 3. Make the Ajax call to the Express endpoint we just set up
Once we've done this, the Listing Adapter will look like this up until the export (which does not change).
import DS from 'ember-data';
import config from '../config/environment';
import Ember from 'ember';

var cosmic;
if (config.environment === "production") {
  Ember.$.ajax('/api', {
    data: {format: 'json'},
    async: false,
    success: function(data) {
      cosmic = {
        bucket: data.bucket,
        writeKey: data.writeKey,
        readKey: data.readKey
      }
    }
  });
} else {
  //config.environment === "development"
  cosmic = {
    bucket: 'cosmic-real-estate',
    writeKey: null,
    readKey: null
  }
}
(The choice to use async: false here is to keep things simple, albeit less than best practice. The idea is that the app can't do anything until the keys are provided - no harm, no foul.)
1. Build the Front End
With our Ember app now ready to go and keys ready to serve, we'll start off the deployment process by building it. In a terminal in cosmic-real-estate, run:
ember build --environment=production --output-path=../public/
We specify our build environment for good measure and use the parent Node app's public directory as the build path.
2. Test the Node App
Navigate up into CosmicRealEstate and run:
node server.js
You should see your app live on localhost:3000
Conclusion
Using Cosmic, Express.js, and Ember.js, you've just built yourself a modular app that you can scale in any direction you choose.
If you stick to our design philosophy and deploy the app to Cosmic, you're now able to completely manage your site and it's content from one place. If you think anything that isn't API first is worse than Mondays, can't stand worrying about databases, and are trying to deliver your content as fast as possible with the least amount of worry, you'll find your happy place with Cosmic.