Sumit Kharche
October 20, 2020
Note: This article has been archived as it may contain features or techniques not supported with the latest version of Cosmic.

In this tutorial, I'm going to show you how to create a simple but blazing fast blog using Blazor WebAssembly, Tailwind CSS, and Cosmic. Without further ado, grab some coffee & let's build a cool app!
TL;DR
Prerequisites
- Installed the latest .NET Core SDK.
- Install the Blazor project templates
- Cosmic account
- Basic knowledge of Blazor
Let's get started with our technology stack.
What is Blazor?
Blazor is a .NET framework developed and maintained by Microsoft. It's been picking up steam over the last couple of years, and recently attracted quite a bit of attention in Spring of 2020 with the launch of Blazor WebAssembly - which is what we'll be using today. If you want to build an interactive web application using C# then you should definitely check Blazor.
According to Blazor's docs:
Blazor is a free and open-source web framework that enables developers to create web apps using C# and HTML. It is being developed by Microsoft. Blazor lets you build interactive web UIs using C# instead of JavaScript. Blazor apps are composed of reusable web UI components implemented using C#, HTML, and CSS. Both client and server code is written in C#, allowing you to share code and libraries. Blazor can run your client-side C# code directly in the browser, using WebAssembly. Because it's real .NET running on WebAssembly, you can re-use code and libraries from server-side parts of your application.
There are two ways to create Blazor apps:
- Blazor Server
- Blazor WebAssembly
So in this article, we are going to use Blazor WebAssembly - which is one way to host Blazor components client-side in the browser using a WebAssembly-based .NET runtime.
What about Cosmic?
Cosmic is a headless CMS that will enable us to build our application surprisingly quickly and deploy it to Netlifly in moments. Unlike traditional CMS, Cosmic offers us as the developers a lot of flexibility to develop this application how we please and take it to whatever hosting platform we wish. It is also very easy to store and retrieve data, which makes it perfect for building apps like this.
Creating Your Blog Bucket in Cosmic
To create a blog app we will require data. To manage and manipulate this data, we will be using the power of Cosmic buckets and objects. To get started:
1. Create a free account on Cosmic. If this is your first time using Cosmic, you'll see a short tutorial which will introduce some of the data types we'll be using - buckets, objects, and metafields.
2. Create a new empty bucket & name it blazor-blog. For each blog post, we will have three object types:
- Title
- Content
- Image
So, go ahead and add these properties in your buckets along with some data for those objects. If you're having trouble with Buckets, Objects, or Metafields, go ahead and read the Getting Started page really quickly for some startup instructions, then come on back to this article.
Creating Your Blazor WebAssembly app
You can now create and run your first Blazor WebAssembly app by running:
dotnet new blazorwasm -o BlazorCosmicBlog --pwa
cd BlazorCosmicBlog
dotnet run
Now open the https://localhost:44346/ to see the default blazor app.
To fetch blog posts saved in Cosmic we require a Cosmic bucket Slug. Go to Cosmic -> Bucket -> Settings -> Basic Settings and copy the Bucket Slug.
To store the slug, create a new file appsettings.josn in the wwwroot folder and add the below code:
Now open the program.cs file and add the below code to load the appsettings.json file.
We are using Tailwind CSS to style our application, so let's add CDN into the index.html file.
<link https://unpkg.com/tailwindcss@^1.0/dist/tailwind.min.css" rel="stylesheet">
Building Our Blog Pages
First, we are building the main category page where we can show all the blog posts. Create a folder called Models and add class to store posts.
Go to Pages folder and open Index.razor component and add the below code to show list of posts fetching from Cosmic.
Let's run the app to see the output.
Looking good! Create a new component into the Pages folder called PostDetails.razor which shows the details of posts when we click on Read More button from all post pages.
Now run the app and click on Read More button from the Home page to see post details.
That's it! All our core features are working. We have successfully created a blog application using Blazor and Cosmic. Now it's just up to your content team members to add some blog posts to it.
Deploying Your Blazor Blog to Hosting Platforms
We can now deploy our application on any hosting platform. We are deploying our app on Netlify using Github Actions.
- Commit your code to the GitHub repository.
- Login to Netlify and create a new site.
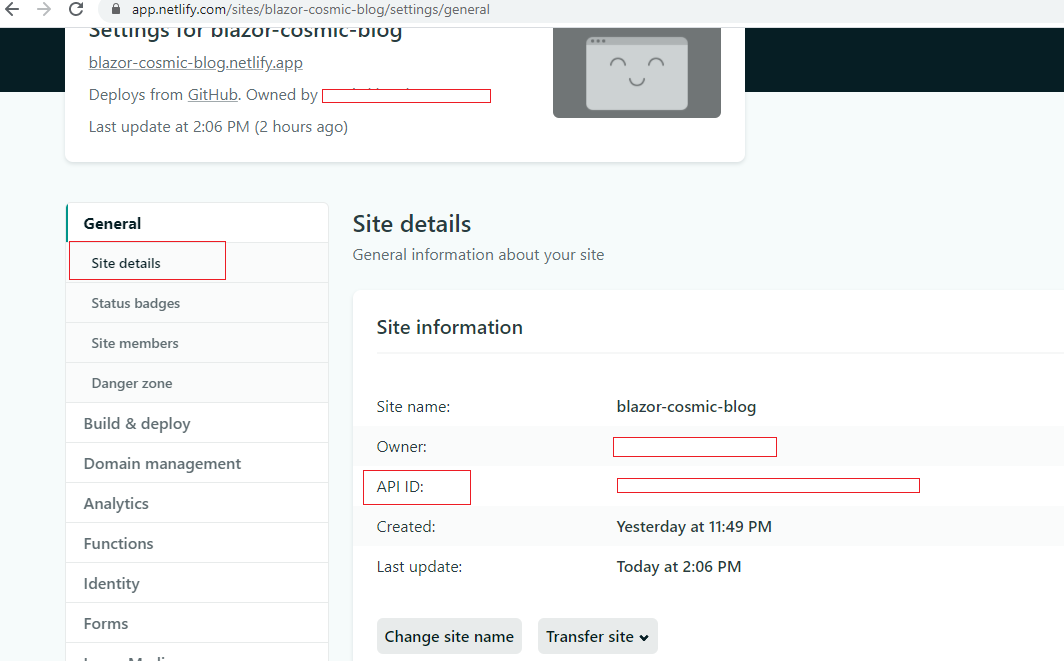
- We need a Personal Access Token and Site Id to deploy our app to netlify. So Go to Profile and generate Personal Access Token.
- Go to your site -> Site details
- Go to your repository Settings -> Secrets and above two secrets:
- Click on Actions -> New Workflow and select .NET Core template. After that add the below code to yml file.
- Our blog app is successfully deployed to Netlify.

Conclusion
In this article, I have demonstrated you how to create a blogging application using Blazor and Cosmic. The Cosmic Community has a lot of examples on how to handle integration with email functions, download functions, and third-party platforms. If you're interested in building your own applications like this, get started by setting up your free account.
I really hope that you enjoyed this little app, and please do not hesitate to send me your thoughts or comments about what could I have done better.
If you have any comments or questions about building apps with Cosmic, reach out to us on Twitter and join the conversation on Slack.


