
Ankit Kumar
May 1, 2019
This tutorial will show you how to build an e-commerce app using Gatsby and Cosmic. This app will give you a basic idea of how we can integrate an e-commerce app with Cosmic to store our data. In this app example, all order data will be stored in the Cosmic database and its speed will charm you. Let's get started.
TL;DR
Introduction to the App
Here we are building an e-commerce app in Gatsby with the backend power of Cosmic. We will make some navigation based on an e-commerce website and at the end placed order will be saved on the Cosmic database. Cosmic provides npm module for JavaScript technologies. Also, it provides API endpoints with the help of which you can directly apply CRUD operations on it. Here we are using API endpoints to store our data.
Requirements
Node.js must be installed on your system, it is required to run npm commands. Choose its latest version and install it on your system.
After node.js, install Gatsby CLI on your system globally. You can find it here: Gatsby CLI
Let’s Get Started
We assumed that you have installed the above software and CLI. Now run the following command to create a new Gatsby app:
gatsby new Gatsby-Ecommerce
After executing this command successfully, it is ensured that you have created a new Gatsby app with the name "Gatsby-Ecommerce". Now to start this, execute the following command from the terminal:
npm start
It will run your app and opens the port: http://localhost:8000/
Configuration with Cosmic
Cosmic is two in one service provider that means it gives the facility of database and server as well. So you need to signup for Cosmic first and create a new bucket with any name you want, here we created the bucket with the name Gatsby Ecommerce. Now it is time to create an object type, which means to the data management. Create object type named orders, All orders will be stored in this object. Now we have to do some basic setting, for this goto basic setting in your dashboard. Have a look at the below screenshot:

Here you can see the read/write keys fields and other IDs. Click on generate read and write keys and save on any text file along with bucket ID and slug.
Now open your Gatsby project in any IDE, here I'm using Visual Basic Code. Now create a folder named config in root od the project and create a new file with name config.js inside the config folder and save the above IDs and keys in the following format:
It is important for you to manage your project properly, so have a look at the screenshot of the folder structure of the project:

Inbuilt Bucket
You can also use an inbuilt bucket. For this, you have to import that inbuilt bucket in your Cosmic account. Here we are providing our bucket for you. You just need to follow these steps:
- Go to our Git repo and download the bucket.json file
- Now go to your Cosmic dashboard and click on basic settings
- Click on Import/Export and click on Add import file, and import the bucket.json file

Now everything is ready, we can move to implement our app now
Home Page
Now we are going to build our app, and the main page is the home page. On this page, we will show the items for shopping. We will add a few items as this app will only show you the compatibility of Gatsby e-commerce app with Cosmic. Location of the home component is src/components/home.js
Check the code of the home component, then we will explain it.
This component is stateful, not a stateless component as most of the Gatsby components usually are.
In this component, we have shown three products which all are iPhones. Main this is that images of these iPhones are kept in a folder and called through a different component. At line number 91, 94, and 97 you can check how these are imported to home.
Here we used the bootstrap modal to show the specifications of the products. Let us explain the working of the main methods.
addToCart(): This is an event-driven method and pushes the product to an array when the user clicks on the add to cart.
handleiPhone8Close() and handleiPhone8Show(): These are the handlers for bootstrap modals which are used to show the specifications of products.

iPhones Component
The iPhone folder has three components named iphone8.js, iphonex.js, and iphonexs.js. These components only used to add images to other components. We used these components in home page. Actually, these components use for this purpose which makes the images loading very fast on websites. Check the code of one image component: components/iPhones/iphone8.js
Cart Component
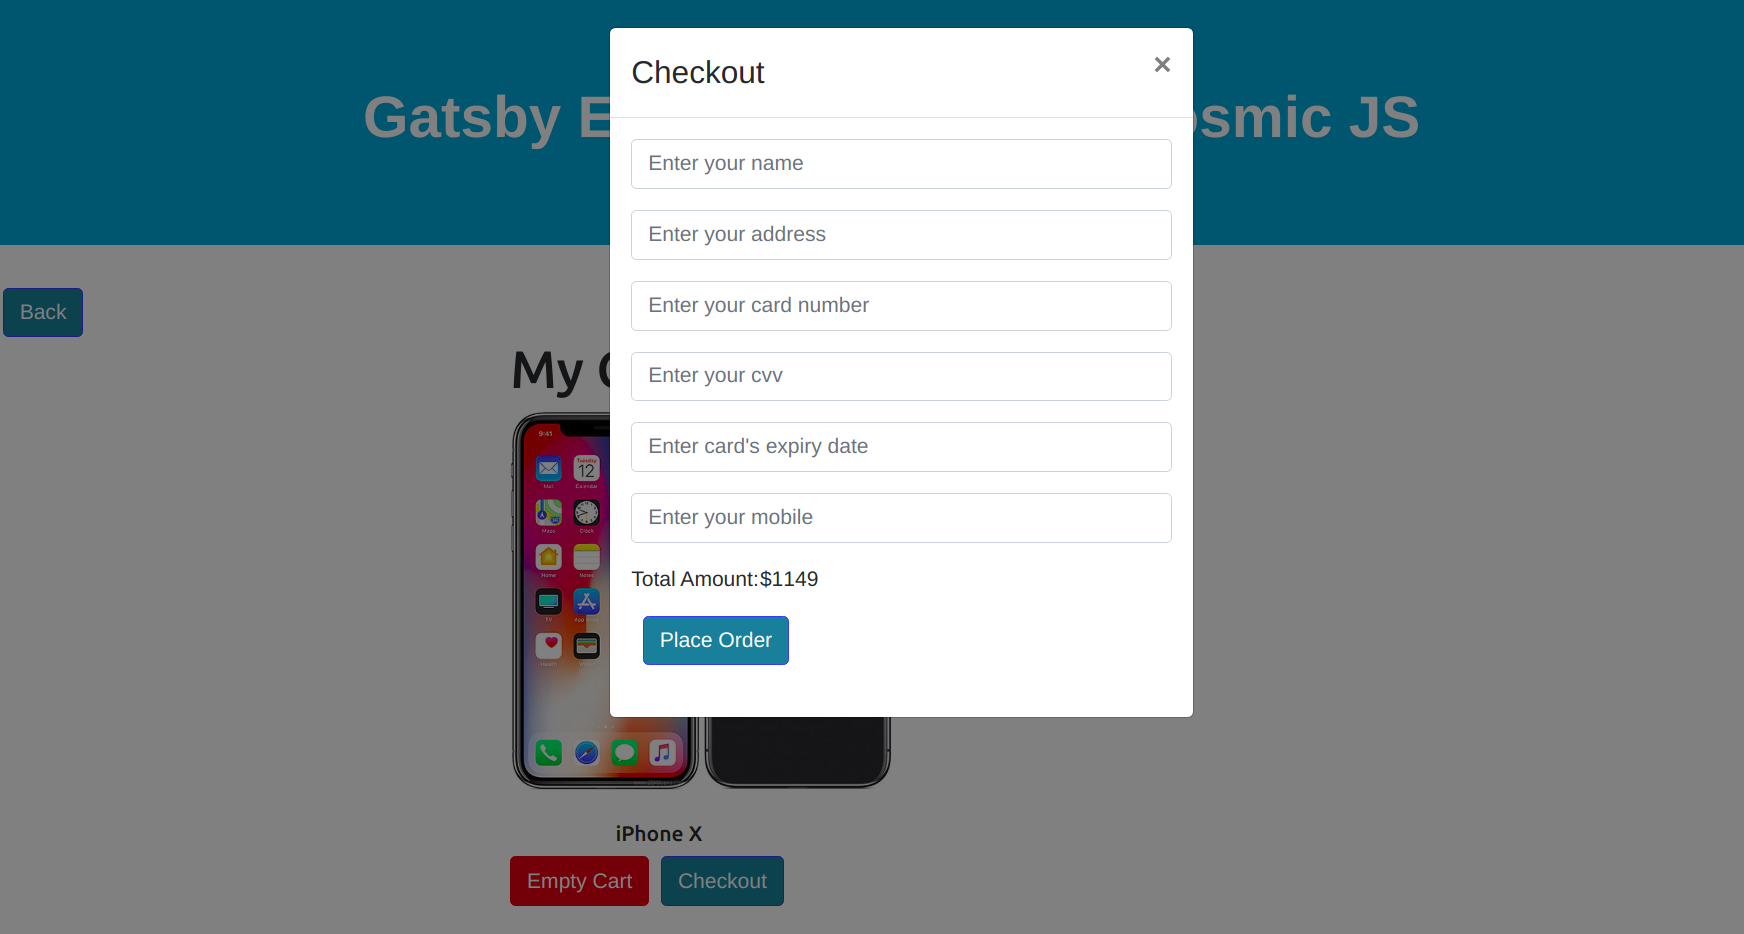
When the user added products to the cart and click the Show Cart button, then flow of the app goes to another page cart.js. Let's check the code of this page: src/pages/cart.js
Let us explain each method of cart.js:
getProducts(): In this method, we are getting the products which are stored in the cart. For cart, we temporary stores the products in local storage. That means this method is getting the products from local storage.
checkingCart(): This method is checking that which product is added to the cart that means this method is filtering the products and calculating the price.
onSubmit(): This is an event-driven method, which collecting the details of the order along with user billing details and passing to the method placeOrder() in the cosmicService.
Cosmic Service
This is the only service in this app which hits the Cosmic API and stores the data to Cosmic database. Check the code: src/services/cosmicService.js
There is only one method in this service named placeOrder() which accepts the seven arguments. It hits the post request to the Cosmic server to save the data. Here we are providing write access key for taking the permission of writing on the Cosmic database. This is an example of storing information in Cosmic; however, it's never advised to store credit card data in Cosmic.
What Functionality We Have Implemented?
Till now we have implemented the complete functionality on the development server. That means we can use the complete functionality of the app in development mode. Because it is a Gatsby app created with npm CLI, so it is deployable on any server which allows deployment from node.js app. Here we deployed our app on Heroku server.
We created this app with Gatsby CLI and used React.js also to make some components stateful. After using this app, you will understand the power of Cosmic because of its blazing speed.
Conclusion
With the help of Cosmic we can create powerful apps and can use the Cosmic database for fast data processing. Here we created and configured a Gatsby.js app with Cosmic without any difficulty. You don't need to install any extra efforts to configure and use Cosmic APIs.
For any query or comment related to building apps in Cosmic, reach out to us on Twitter and join the conversation on Slack.