Cosmic
June 21, 2017

In this tutorial, we're going to create a small Twitter-like mobile app using React Native. With our app, users will be able to create accounts and log in, see a feed of all of the posts created by themselves and other users, and add their own posts to the feed. The data for all of our users and posts will be managed by Cosmic.
TL;DR
View the source code on GitHub
Install the app on Cosmic (you still need to run locally)
Getting Started
You’ll need to have node.js and yarn or npm installed. For this project I'm using yarn and node v8.1.2.
There are a number of ways to start a new React Native project; for this one, I used create-react-native-app. We can globally install CRNA and fire up a new project by running the following commands:
$ yarn global add create-react-native-app
$ create-react-native-app twitter-clone
$ cd twitter-clone/
$ yarn start
I'm also using the Expo SDK so that I don't have to get Xcode and Android Studio set up. This is also going to provide me with features that will help with things like loading fonts and allowing users to upload photos to the app. To get started with Expo, please refer to the docs.
Dependencies
We're going to use several tools for this project; we'll talk about a few of the key ones here.
- Native Base is a component library that will allow us to quickly make an attractive user interface that works cross-platform.
- React Native Router Flux will help us navigate between the different screens of our app.
- React-Redux will connect the different components of our app to our store where we will keep data about the state of our application.
- Axios is a promised-based HTTP client that we will use to make our calls to the Cosmic API.
Go ahead and copy and paste the following into your package.json and then run yarn install again.
{
  "name": "twitter-clone",
  "version": "1.0.0",
  "private": true,
  "devDependencies": {
    "jest-expo": "~1.0.1",
    "react-native-scripts": "0.0.30",
    "react-test-renderer": "16.0.0-alpha.6"
  },
  "main": "./node_modules/react-native-scripts/build/bin/crna-entry.js",
  "scripts": {
    "start": ""react-native-scripts start",
    "eject": "react-native-scripts eject",
    "android": "react-native-scripts android",
    "ios": "react-native-scripts ios",
    "test": "node node_modules/jest/bin/jest.js --watch"
  },
  "jest": {
    "preset": "jest-expo"
  },
  "dependencies": {
    "@expo/vector-icons": "^5.0.0",
    "axios": "^0.16.1",
    "expo": "^17.0.0",
    "form-data": "^2.2.0",
    "native-base": "^2.1.4",
    "react": "16.0.0-alpha.6",
    "react-native": "^0.44.0",
    "react-native-router-flux": "^3.39.2",
    "react-redux": "^5.0.5",
    "redux": "^3.6.0",
    "redux-devtools-extension": "^2.13.2",
    "redux-logger": "^3.0.6",
    "redux-thunk": "^2.2.0",
  }
}
Directory Structure
Compared to some other boilerplates, CRNA is pretty unopinionated about how we structure the files in our application; it just gives us an index.ios.js and index.android.js and App.js as a starting point.
We're going to have our App.js point to a folder called app that will hold all of our components, layouts, config files, and our redux store and reducers. The following is the scaffolding that I have found works best for me. I won't go into the contents of each and every file in this post, but you can see it all in the source code.
Here is what our app folder will look like:
.
├── assets
│   └── fonts
│       └── Pacifico.ttf
├── components
│   ├── FeedNavbar
│   │   ├── FeedNavbar.js
│   │   ├── index.js
│   │   └── styles.js
│   ├── SinglePost
│   │   ├── SinglePost.js
│   │   ├── index.js
│   │   └── styles.js
│   ├── SmallButton
│   │   ├── SmallButton.js
│   │   ├── index.js
│   │   └── styles.js
│   └── TextField
│       ├── TextField.js
│       ├── index.js
│       └── styles.js
├── config
│   ├── cosmic.js
│   └── routes.js
├── layouts
│   ├── feed
│   │   ├── Feed.js
│   │   ├── index.js
│   │   └── styles.js
│   ├── login
│   │   ├── Login.js
│   │   ├── index.js
│   │   └── styles.js
│   ├── newPost
│   │   ├── NewPost.js
│   │   ├── index.js
│   │   └── styles.js
│   ├── signup
│   │   ├── Signup.js
│   │   ├── index.js
│   │   └── styles.js
│   └── welcome
│       ├── Welcome.js
│       ├── index.js
│       └── styles.js
└── redux
    ├── reducers
    │   ├── index.js
    │   ├── posts.js
    │   └── users.js
    └── store.js
App
A few things are going to happen in our App.js file. We will:
- Pull in our routes which navigate to our various layouts
- Connect our provider to our store which will let our layouts access our application state
- Provide access to some fonts that Natve Base uses
- Establish our root component with AppRegistry
You can copy and paste the following into your App.js file in the project root:
import React, { Component } from 'react';
import { AppRegistry, View } from 'react-native';
import { Provider, connect } from 'react-redux';
import { Font, AppLoading } from 'expo';
import store from './app/redux/store';
import Router from './app/config/routes';

export default class App extends Component {
  constructor(){
    super();
    this.state = {
      isReady: false,
    }
  }

  async componentWillMount() {
    await Font.loadAsync({
      'Roboto': require('native-base/Fonts/Roboto.ttf'),
      'Roboto_medium': require('native-base/Fonts/Roboto_medium.ttf'),
      'Pacifico': require('./app/assets/fonts/Pacifico.ttf'),
      'Ionicons': require('native-base/Fonts/Ionicons.ttf'),
    });

    this.setState({isReady: true});
  }


  render() {
    if (!this.state.isReady) {
      return <AppLoading />;
    }
    return (
      <Provider store={store}>
        <Router />
      </Provider>
    );
  }
}

AppRegistry.registerComponent('main', () => App);
Next, let's take a look at our routes.js file:
import React from 'react';
import { Scene, Router, Actions, ActionConst } from 'react-native-router-flux';
import Welcome from '../layouts/welcome';
import Login from '../layouts/login';
import Signup from '../layouts/signup';
import NewPost from '../layouts/newPost';
import Feed from '../layouts/feed';

const scenes = Actions.create(
  <Scene key="root">
    <Scene key="welcome" component={Welcome} title="Welcome" initial={true} />
    <Scene key="login" component={Login} title="Login" type={ActionConst.REPLACE} />
    <Scene key="signup" component={Signup} title="Create New Account" type={ActionConst.REPLACE} />
    <Scene key="feed" component={Feed} title="Your Feed" type={ActionConst.REPLACE} hideNavBar />
    <Scene key="newPost" component={NewPost} title="Make a new post" />
  </Scene>
);

export default () => (
  <Router scenes={scenes} />
);
Using React Native Router Flux, we've just created a bunch of scenes to which we can easily navigate from anywhere in our app.
Our first scene is the Welcome layout, where users will choose between logging in and creating a new account. It looks like this:
import React from 'react';
import {
  Container,
  Content,
  Icon,
  Text,
  Button,
} from 'native-base';
import { View } from 'react-native';
import { Actions } from 'react-native-router-flux';

import styles from './styles';


export default () => (
  <Container style={styles.container}>
    <Content>
      <View style={styles.iconBox}>
        <Icon
          style={styles.icon}
          ios="ios-happy-outline"
          android="md-happy"
        />
        <Text style={styles.welcome}>Welcome</Text>
      </View>
      <View style={styles.buttonContainer}>
        <Button
          block
          style={styles.button}
          onPress={() => Actions.login()}
        >
          <Text>Log in</Text>
        </Button>
        <Text style={styles.or}>OR</Text>
        <Button
          block
          style={styles.button}
          onPress={() => Actions.signup()}
        >
          <Text>Sign up</Text>
        </Button>
      </View>
    </Content>
  </Container>
)
Here we've just created two buttons with Native Base that will navigate to the Loginand Signup layouts.
Let's take a look at our Signup layout and see what happens when users create a new account.
import React, { Component } from 'react';
import { connect } from 'react-redux';
import { ImagePicker } from 'expo';
import { Actions } from 'react-native-router-flux';
import {View} from 'react-native';
import {
  Container,
  Content,
  Button,
  Text,
  Form,
  Thumbnail,
  Icon
} from 'native-base';
import axios from 'axios';

import TextField from '../../components/TextField';
import styles from './styles';
import { addUser } from '../../redux/reducers/users';
import cosmicConfig from '../../config/cosmic';

const mapDispatchToProps = {addUser};

const validate = form => {
  let errorMessage = '';
  if (form.username.includes(" ")){
    errorMessage = "Username cannot contain spaces";
  }
  if (form.password.includes(" ")){
    errorMessage = "Password cannot contain spaces";
  }
  Object.keys(form).slice(0, 5).map(field => {
    if (!form[field]){
      errorMessage = 'All fields must be filled';
    }
  })
  return errorMessage;
}

class Signup extends Component {
  constructor() {
    super();
    this.state = {
      firstName: '',
      lastName: '',
      username: '',
      password: '',
      image: null,
      error: '',
    };
  }

  onSubmit(){
    const error = validate(this.state);
    if (error) {
      this.setState({ error })
    } else {
      this.checkUsername(this.state.username);
    }
  }

  checkUsername(username){
    axios.get(`https://api.cosmicjs.com/v1/${cosmicConfig.bucket.slug}/object-type/users/search?metafield_key=username&metafield_value=${username}`)
    .then(res => res.data)
    .then(data => {
      if (data.objects) {
        this.setState({ error: 'Username not available'})
      } else {
        this.props.addUser(this.state);
      }
    })
  }

  uploadImage = async () => {
    let result = await ImagePicker.launchImageLibraryAsync({
      allowsEditing: true,
      aspect: [4, 3],
    });
    if (!result.cancelled) {
      this.setState({ image: result.uri });
    }
  };

  render(){
    return (
      <Container style={styles.container}>
        <Content>
          <Form style={styles.mar10}>
            <TextField
              name="First Name"
              value={this.state.firstName}
              onChangeText={(text) => this.setState({firstName: text})}
            />
            <TextField
              name="Last Name"
              value={this.state.lastName}
              onChangeText={(text) => this.setState({lastName: text})}
            />
            <TextField
              name="Username"
              value={this.state.username}
              onChangeText={(text) => this.setState({username: text})}
            />
            <TextField
              secureTextEntry
              name="Password"
              value={this.state.password}
              onChangeText={(text) => this.setState({password: text})}
            />
          </Form>
          <Text style={styles.addPic}>Add a profile picture</Text>
          {
            !this.state.image &&
            <Button
              primary
              bordered
              onPress={this.uploadImage}
              style={styles.uploadButton}>
              <Icon
                ios='ios-camera'
                android='md-camera'
              />
            </Button>
          }
          {
            this.state.image &&
            <Thumbnail
              size={80}
              source={{uri: this.state.image}}
              style={styles.thumbnail}
            />
          }
          <Button
            block
            style={styles.mar10}
            onPress={() => this.onSubmit()}
          >
            <Text>Create account</Text>
          </Button>
          <Text style={styles.formMsg}>{this.state.error}</Text>
          <Button
            transparent
            style={styles.loginBtn}
            onPress={() => Actions.login()}
          >
            <Text style={styles.loginTxt}>Already have an account?</Text>
          </Button>
        </Content>
      </Container>
    );
  }
}

export default connect(null, mapDispatchToProps)(Signup);
There are a couple of things that happen here:
- We keep the contents of our form fields on state as the users fill out the form.
- When users submit, we do some simple validation to make sure that they have filled out the fields with valid input.
- We then make our first call to the Cosmic API to make sure that the username they have selected is not already in use.
- Finally, when all of the fields contain valid input, we submit the form as a new user to the Cosmic API with our addUserfunction.
The addUser function is defined in our usersreducer; it looks like this:
export const addUser = user => dispatch => {
  let data = new FormData();
  data.append('media', {
        uri: user.image,
        type: 'image/jpeg',
        name: 'image'
      });

  return axios.post(`https://api.cosmicjs.com/v1/${cosmicConfig.bucket.slug}/media`, data)
  .then(res => res.data.media)
  .then(media => {
    return axios.post(`https://api.cosmicjs.com/v1/${cosmicConfig.bucket.slug}/add-object`, {
      title: user.firstName + ' ' + user.lastName,
      type_slug: 'users',
      metafields: [
        {
          key: 'name',
          type: 'text',
          value: user.firstName + ' ' + user.lastName,
        },
        {
          key: 'username',
          type: 'text',
          value: user.username,
        },
        {
          key: 'password',
          type: 'text',
          value: user.password,
        },
        {
          key: 'profile_picture',
          type: 'file',
          value: media.name,
              }
            ]
          }
        )}
      )
      .then(res => formatUser(res.data))
      .then(formattedUser => dispatch(createUser(formattedUser)))
      .then(() => Actions.feed())
      .catch(err => console.error(`Creating user unsuccessful`, err))
}
Here we make two calls to the Cosmic API. The first call will post the user's profile picture to our bucket as Media, and the second will use the reference to the picture that we get back to post all of the user's information as a new user.
If the user has already created an account, they can login:
import React, { Component } from 'react';
import { connect } from 'react-redux';
import {
  Container,
  Content,
  Icon,
  Text,
  Button,
} from 'native-base';
import { View } from 'react-native';
import { Actions } from 'react-native-router-flux';
import TextField from '../../components/TextField';
import styles from './styles';

import { authenticate } from '../../redux/reducers/users';

const mapDispatchToProps = {authenticate};

const validate = form => {
  let errorMessage = '';
  if (form.username.includes(' ') || form.password.includes(' ')){
    errorMessage = 'Username and password cannot contain spaces';
  }
  if (form.username === '' || form.password === ''){
    errorMessage = 'All fields must be filled';
  }
  return errorMessage;
}

class Login extends Component {
  constructor(props) {
    super(props);
    this.state = {
      username: '',
      password: '',
      error: '',
    };
  }

  onSubmit(){
    const error = validate(this.state);
    if (error) {
      this.setState({ error })
    } else {
    this.login();
    }
  }

  login(){
    this.props.authenticate(this.state)
      .then(res => {
        if (res === 'Username invalid' || res === 'Password invalid'){
          this.setState({
            error: res,
            username: '',
            password: '',
          })
        } else {
          Actions.feed();
        }
      });
  }

  render(){
    return (
      <Container style={styles.container}>
        <Content>
          <Text style={styles.formMsg}>{this.state.error}</Text>
          <Icon
            style={styles.icon}
            ios="ios-happy-outline"
            android="md-happy"
          />
          <View style={styles.loginBox}>
            <TextField
            name="Enter Username"
            type="big"
            value={this.state.username}
            onChangeText={(text) => this.setState({username: text})}
            />
            <TextField
            secureTextEntry
            name="Enter Password"
            type="big"
            value={this.state.password}
            onChangeText={(text) => this.setState({password: text})}
            />
          <Button
            block
            style={styles.button}
            onPress={() => this.onSubmit()}
          >
            <Text>Log in</Text>
          </Button>
          </View>
          <Button
            transparent
            style={styles.signupBtn}
            onPress={() => Actions.signup()}>
            <Text style={styles.signupTxt}>Sign up for an account</Text>
          </Button>
        </Content>
      </Container>
    );
  }
}

export default connect(null, mapDispatchToProps)(Login);
Again, we check to make sure that the fields have valid input, and then check the login info against what is in our bucket using our authenticatefunction:
export const authenticate = user => dispatch => {
  return axios.get(`https://api.cosmicjs.com/v1/${cosmicConfig.bucket.slug}/object-type/users/search?metafield_key=username&metafield_value=${user.username}`)
    .then(res => res.data)
    .then(data => {
      console.log('RESPONSE: ', data);
      if (data.objects) {
        const userData = data.objects[0];
        return {
          password: userData.metadata.password,
          username: userData.metadata.username,
          name: userData.metadata.name,
          profilePicture: userData.metadata.profile_picture,
          slug: userData.slug,
          id: userData._id,
        }
      } else {
        return 'Username invalid';
      }
    })
    .then(data => {
      if (data === 'Username invalid'){
        return data;
      } else if (data.password === user.password){
        dispatch(login({
          name: data.name,
          username: data.username,
          profilePicture: data.profilePicture,
          slug: data.slug,
          id: data.id,
        }))
      } else {
        return 'Password invalid';
      }
    })
    .catch(error => console.error('Login unsuccessful', error))
}
As a side note, we normally wouldn't want to be storing user credentials directly to our database without some kind of encryption, but we'll leave it like this for now as a simple illustration of how we can manage our data with the Cosmic API.
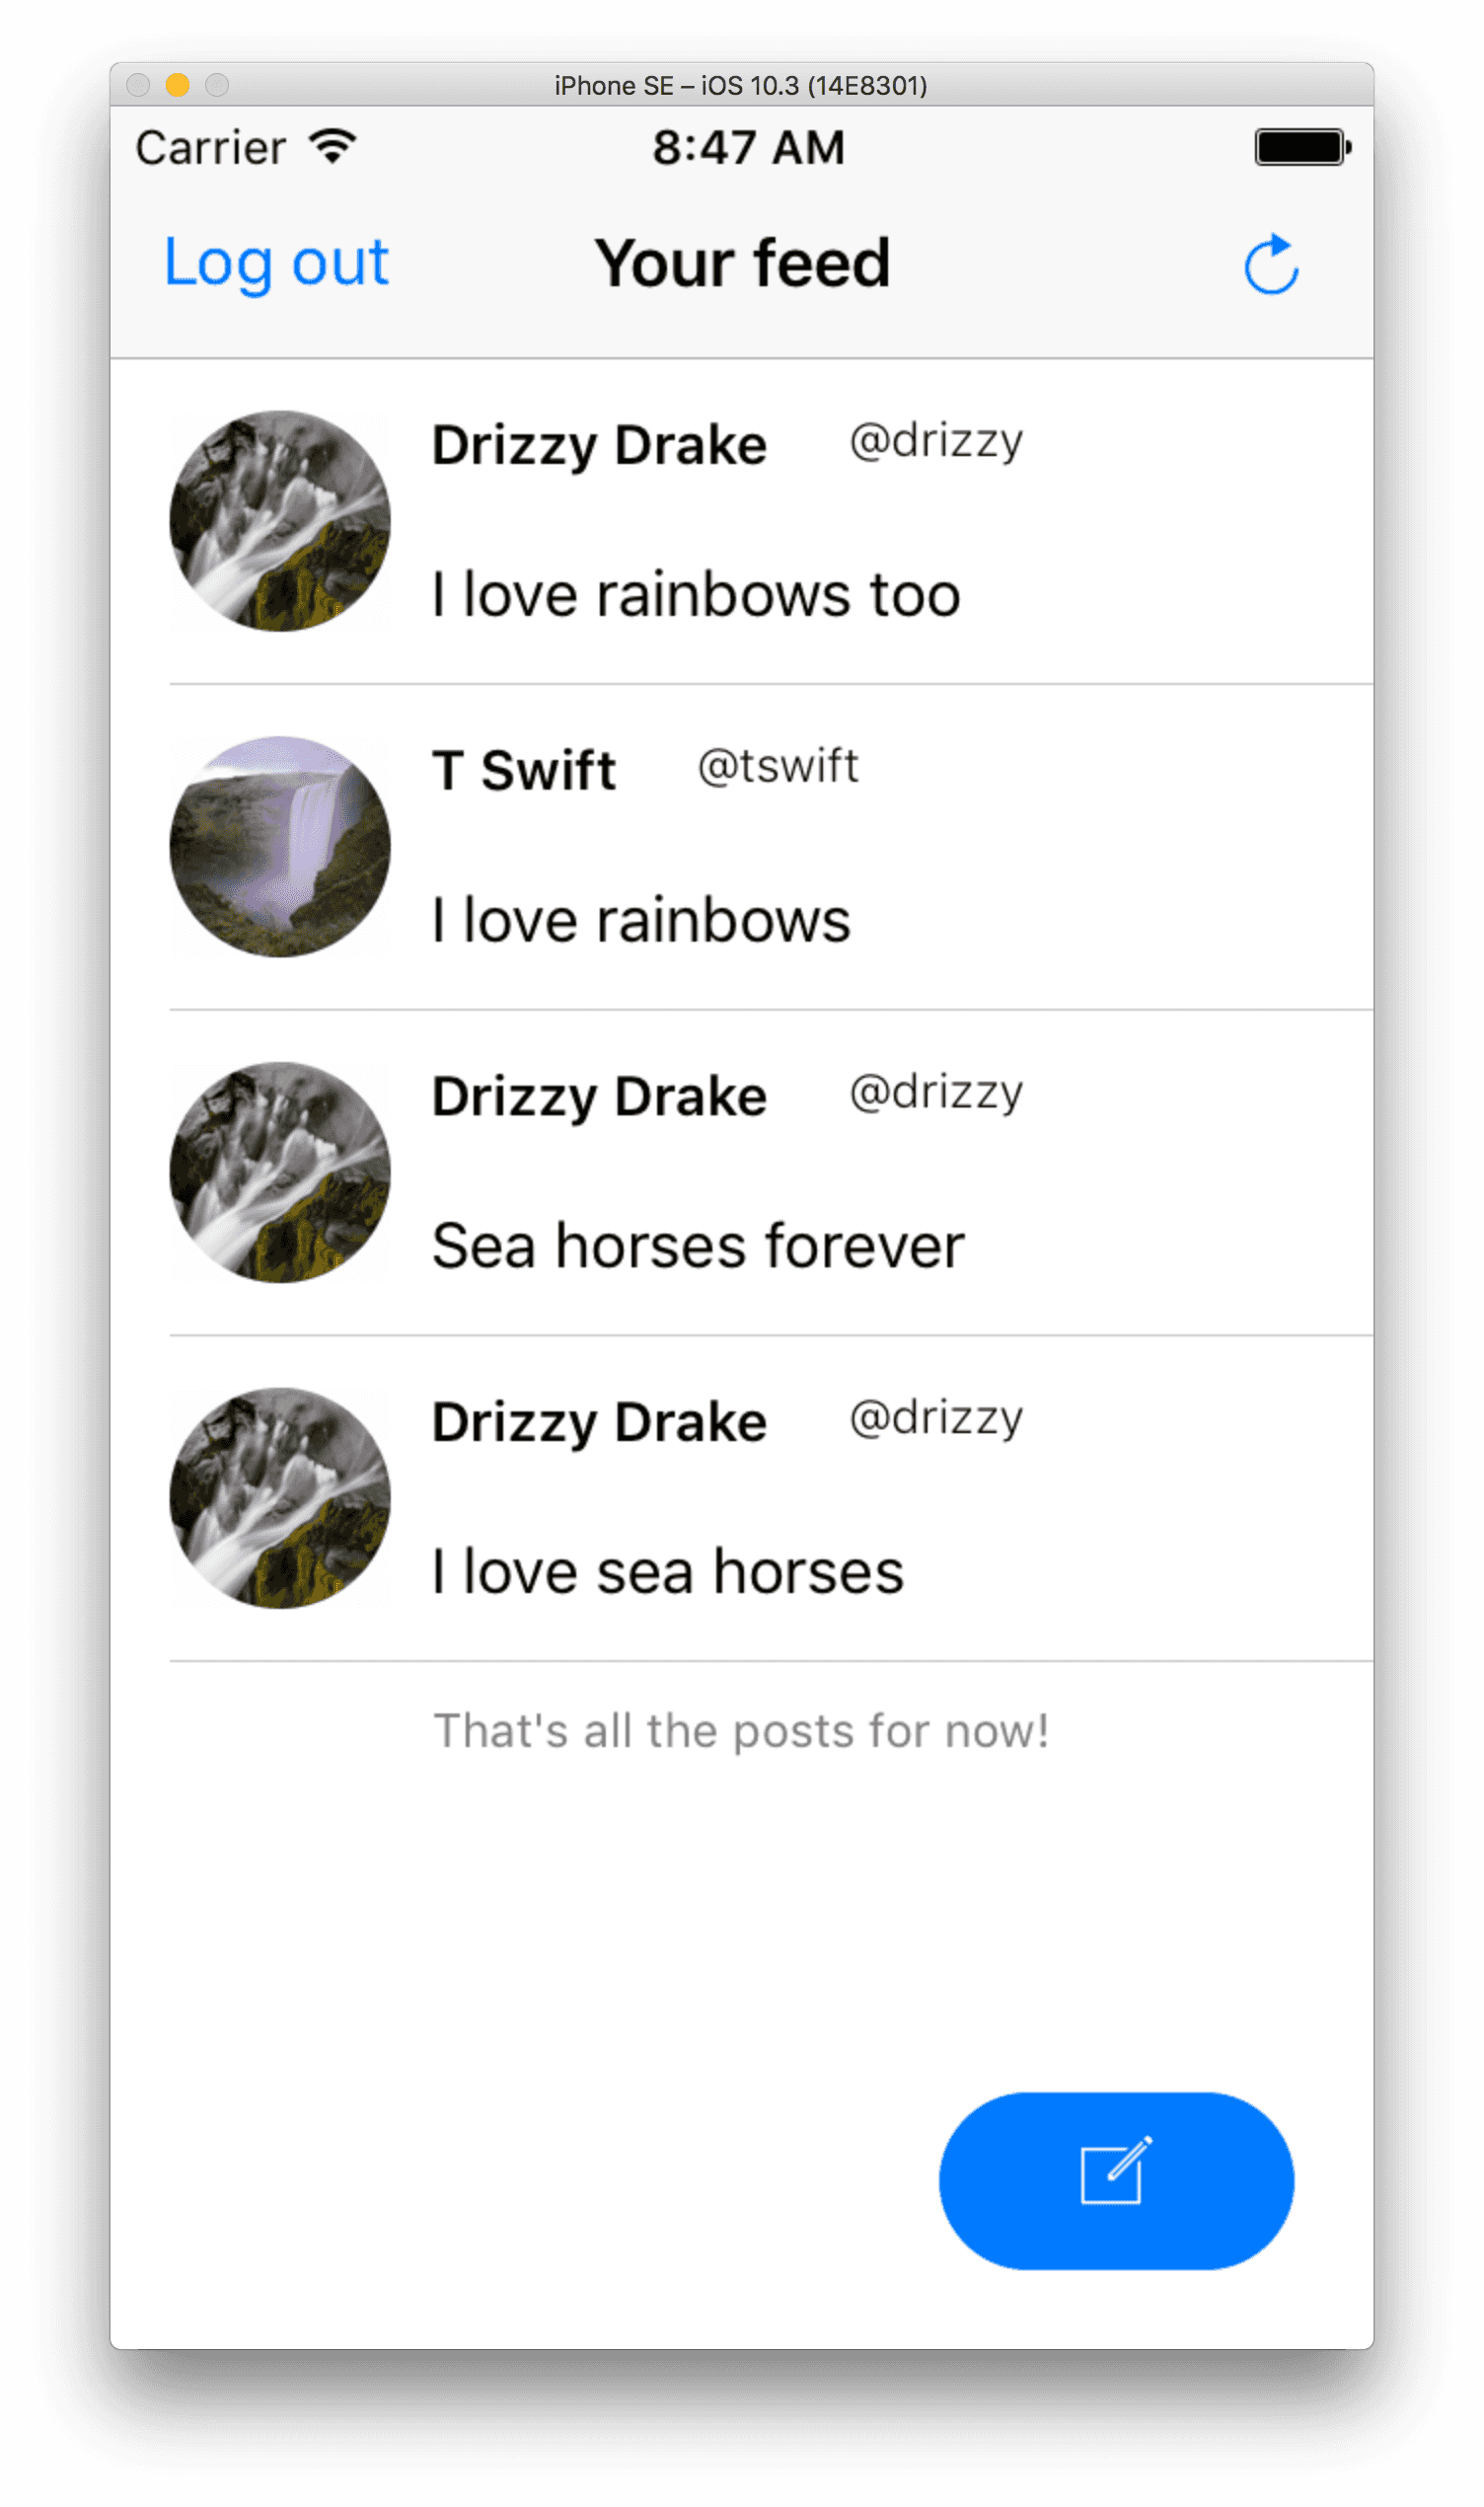
When users are logged in, they will go directly to the Feed layout, which looks like this:
import React, { Component } from 'react';
import { connect } from 'react-redux';
import { Actions } from 'react-native-router-flux';
import {
  Container,
  Content,
  List,
  Button,
  Icon,
  Text,
} from 'native-base';

import SinglePost from '../../components/SinglePost';
import FeedNavbar from '../../components/FeedNavbar';
import { loadPosts } from '../../redux/reducers/posts';
import { logoutUser } from '../../redux/reducers/users';
import styles from './styles';

const mapStateToProps = ({ posts }) => ({ posts });

const mapDispatchToProps = { loadPosts, logoutUser };

const renderPost = (post, index) => (
  <SinglePost
    key={index}
    name={post.name}
    username={post.username}
    profilePicture={post.profilePicture}
    content={post.content}
  />
)

class Feed extends Component {
  componentDidMount(){
    this.props.loadPosts();
  }

  render(){
    const endMsg = this.props.posts.length === 0 ? "There aren't any posts yet!" : "That's all the posts for now!"

    return (
      <Container>
        <FeedNavbar logout={this.props.logoutUser} refresh={this.props.loadPosts} />
        <Content>
          <List>
            {
              !!this.props.posts.length && this.props.posts.map(renderPost)
            }
          </List>
          <Text style={styles.end}>{endMsg}</Text>
        </Content>
        <Button
          rounded
          style={styles.button}
          onPress={() => Actions.newPost()}
        >
          <Icon
            name="create"
            style={{padding: 5}}
          />
        </Button>
      </Container>
    );
  }
}

export default connect(mapStateToProps, mapDispatchToProps)(Feed);
When the Feed layout mounts, we make a call to the Cosmic API to load all of the posts in our bucket onto our app state. The loadPostsfunction, in our posts reducer, looks like this:
export const loadPosts = () => dispatch => {
  return axios.get(`https://api.cosmicjs.com/v1/${cosmicConfig.bucket.slug}/object-type/posts`)
    .then(res => res.data.objects ? formatPosts(res.data.objects) : [])
    .then(formattedPosts => formattedPosts.sort(postSorter))
    .then(sortedPosts => dispatch(init(sortedPosts)))
    .catch(err => console.error(`Could not load posts`, err));
};
We pull in all of the posts that are in our bucket, format them in a way that will make it easy to get the data that we want, and load them onto state. They are then displayed in the feed.
From the feed, users can click a button to make a new post. They are then taken to the NewPostlayout:
import React, { Component } from 'react';
import { connect } from 'react-redux';
import {
  Container,
  Content,
  Text,
  Button,
} from 'native-base';
import { View } from 'react-native';
import TextField from '../../components/TextField';
import styles from './styles';

import { createPost } from '../../redux/reducers/posts';

const mapStateToProps = state => ({
  user: state.user,
})

const mapDispatchToProps = { createPost };

class NewPost extends Component {
  constructor(){
    super();
    this.state = {
      content: '',
      error: '',
    }
  }
  onSubmit() {
    if (this.state.content){
      this.props.createPost({
        user: this.props.user,
        content: this.state.content,
      })
    } else {
      this.setState({error: 'You have to write something!'});
    }
  }

  render(){
    return (
      <Container style={styles.container}>
        <Content>
          <Text style={styles.formMsg}>{this.state.error}</Text>
          <View style={styles.input}>
            <TextField
              big
              name="What's up?"
              value={this.state.post}
              onChangeText={(text) => this.setState({content: text})}
            />
            <Button
              rounded
              style={styles.button}
              onPress={() => this.onSubmit()}
            >
              <Text>Post</Text>
            </Button>
          </View>
        </Content>
      </Container>
    );
  }
}

export default connect(mapStateToProps, mapDispatchToProps)(NewPost);
When they submit their post, we will send it to our bucket:
export const createPost = post => dispatch => {
  return axios.post(`https://api.cosmicjs.com/v1/${cosmicConfig.bucket.slug}/add-object`, {
      title: post.user.username + ' post',
      type_slug: 'posts',
      content: post.content,
      metafields: [
        {
          type: 'object',
          title: 'User',
          key: 'user',
          object_type: 'users',
          value: post.user.id
        },
      ]
    })
      .then(res => formatPost(res.data, post))
      .then(formattedPost => dispatch(create(formattedPost)))
      .then(() => Actions.feed({type: 'popAndReplace'}))
      .catch(error => console.error('Post unsuccessful', error))
}
and then redirect back to the feed which will pull in the updated list of posts. Users can also refresh their feed to see new posts and logout from the Feed.
Conclusion
We made a Twitter-like app using React Native which utilized the power of the Cosmic API to easily maintain all of the data for our users and posts. We were able to get up and running quickly with a few simple actions that POST and GET our data to/from our Cosmic Bucket.